
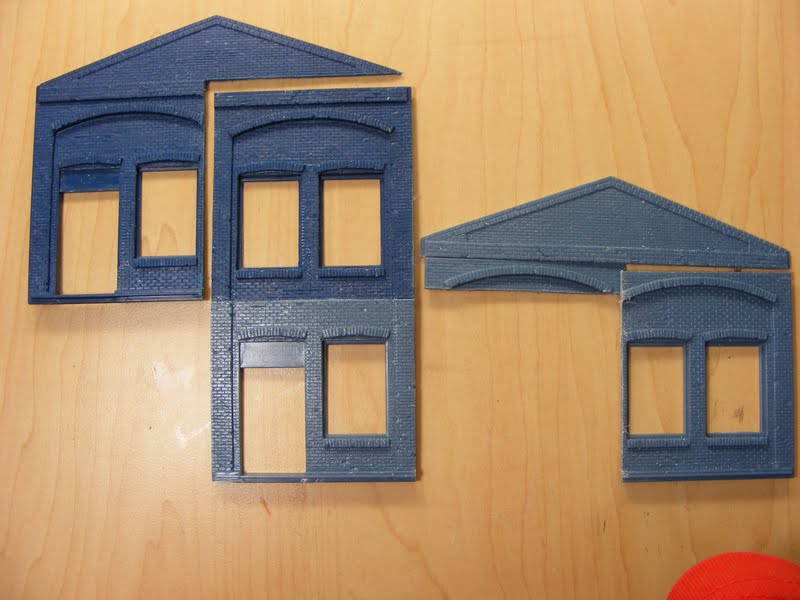
Now on to the middle, old section of the building. It is made from the classic Superior Bakery kit. The bakery is a single-story structure, and these are the two long walls from the kit. These are the cuts needed to assemble them into one two-story wall (hence the need for two kits). Let me make a few comments here. Art's projects usually required a lot of razor saw cuts, and this one is particularly cut-intensive. If you didn't have saw skills when you started this bash, you definitely had them when you finished. Also, older model kits (and one of these was produced in 1962) were made of styrene that was harder and more brittle than is produced today, and in this case, thicker as well. This part of the project really took some time and effort.

Here the two pieces are glued together. What's that, you ask? Is there something wrong with my camera? Did I use different lights? No, your eyes are not playing tricks on you, this wall is made of a lighter shade of plastic. This wall was made from the Revell kit from '62, while the darker walls are from a Con-Cor kit made in the '80s. Art's kits were both dark blue, which contrasts nicely with the light blue of the Pikestuff addition. I'll probably go with the darker blue as well.
Something else to mention here. The two-window section on the lower right from the electrical box to the plain wall is a separate piece, and a fairly ill-fitting piece at that. When Revell originally made this kit, they made two others, the Weekly Herald and the Two-Stall Engine House, that used most of the same parts. The end walls were different as well as that two-window cutout. Sprues with different roof and wall details made three distinct kits that shared a common backbone.

The cuts made to two end walls to make a two-story wall. This project leaves you with a lot of spare cut-offs for other projects.
Art made a bump out section he called the Annex. This is the cutting guide for it. A whole lotta cuts.

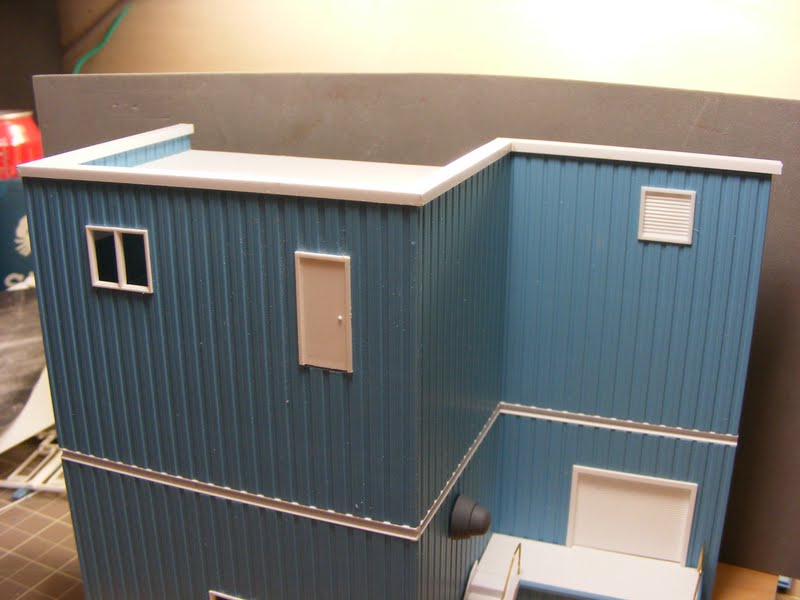
Here the Annex is assembled and glued in place, along with the doors for it.

Now we move to the back of the building and deviation #3. Art did not have any rail service to this building, relying strictly on trucks to ship and receive. I felt a spur for an occasional boxcar would be nice. I had two wooden shipping doors from another kit that would fit and look appropriate. Time to remove that ill-fitting section that I so meticulously fit just a short time earlier.

Now I needed some matching brickwork to fill that hole and hold those doors. Let me introduce to you the front facade of the Weekly Herald. When I first started this project, I wasn't sure I would be able to secure two Superior Bakery kits, so I picked up two Weekly Herald kits to hedge my bets. They are more readily available on eBay and cheaper to boot.

The ill-fitting section removed.

With some careful cutting, I had a wall that fit and two doors that were actually even with each other.

ARE YOU AN INNIE OR AN OUTIE? Most of my loading docks are outies, like the one on the new addition. But here I thought I would have a dock that was mostly on the inside of the doors. That would require the spur (and the boxcar) to be very close to the building, providing an interesting visual detail. So I added some short sidewalls and a 'concrete' foundation. I also decided to open one of the doors and create an interior scene.

I lucked out here. I figured it would take two door castings to make the one open door. One casting where I'd trim the outer casing away, leaving just the door, and one casting where I'd junk the doors to leave the outer frame work. Fortunately, that small razor saw allowed me to cut the doors away from the frame, and salvage both.

A view from inside. I've added the side walls, and the frame to support the floor. "Why the notches?", you ask.

To clear the large 'H' beam used to stiffen the wall.

The floor, .020 scribed styrene laminated to a plain piece of .020 for thickness. You can see where I cut the ends to make individual boards. I also added the channel under the doors to support the floor.

The view from inside, with the floor installed and the doors on.

The outside view. I still need to add lots of details to the interior walls and floor. And hinges for the doors.

The loading dock in place. A lot more to due, but I'm satisfied with the progress.

That's it for now. Let me know what you think. Don
Nice kitbashing Don!
ReplyDeleteThanks Dave. This project is a lot of work, but I am enjoying myself.
ReplyDeleteHi Don,
ReplyDeleteNice work as usual: You really have "gold in your hands"*, you know.
* I mean that everything in your hands turns to something wonderful.
Here is a clip I've just seen and that has made me think of you with the industrial and train scenery it uses:
http://www.youtube.com/v/ShbC5yVqOdI&autoplay=1&hd=1
Enjoy!
Neelix
Thanks for the complement, Neelix. Even though I've been building models for over 40 years, I like to think I keep improving.
ReplyDeleteThat video is fantastic. Is he crazy, or what? His balance is better on the bike than on his feet. That is a very interesting backdrop where he performs.
Don