The first problem to overcome was connecting the worm gear to the motor. The motor's shaft is smaller than the originals, and would not fit snugly in the worm. The first step was to glue an 1/16th" styrene tube to the shaft. The problem here was the inner diameter of the tube was smaller than the shaft. Using a drill bit only slightly larger than the tube's hole, I carefully reamed it out, letting the bit do the work of following the hole. I then used a succession of increasing diameter bits to enlarge the hole. I used a total of five bits to do the job, and even though I went slowly, letting the bits themselves find the channel, it still took six attempts to get one that didn't wobble on the shaft. This was the most time consuming part of this step. Now the motor shaft was too large for the hole in the worm gear, so I drilled it out to accept a 1/16th" brass tube. Finally I cut a short length of 1/8th" brass tube, which just happens to have an inner diameter of 1/16th". (Cutting the brass can easily be done with the Zona razor saws, but a cut-off wheel in my Dremel is faster.)

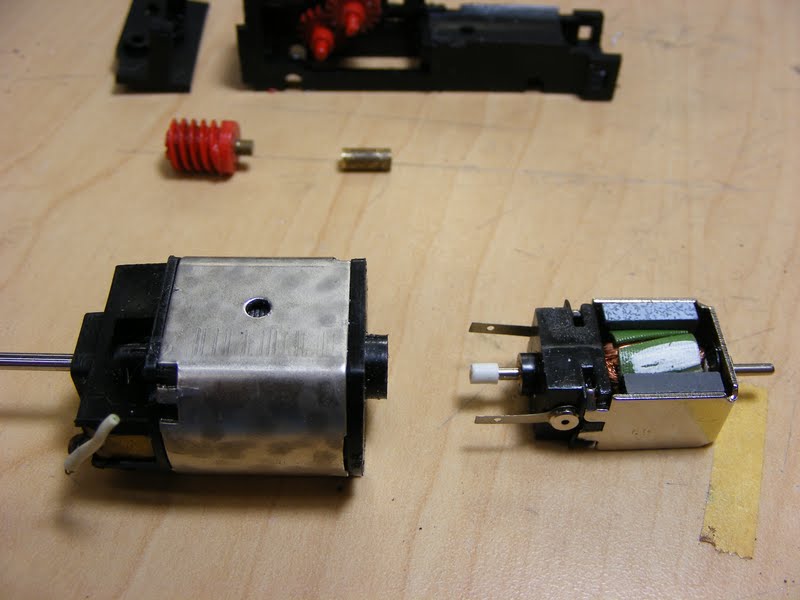
Here you can see how much smaller the new motor is.
Here I've attached the three pieces with some thickened super glue. ( From now on I will refer to any kind of super glue by the generic CA, for cyanoacrylate. For the record, I prefer the Zap line of CA's.) If I was re-motoring a larger locomotive, I would use some more permanent method, but as this loco will only see moderate use for short distances, I feel this connection should hold up. (Notice I used the cut-off wheel to remove most of the rear shaft.)

To mount the motor level, I laminated some styrene strips, which I sanded to match the curve of the chassis, then attached it by screws from underneath. The final top piece of strip shimmed the motor to the correct height so the worm gear would mesh with the transmission.

The motor CA'd to the block. And yes, it did work. I ended up losing the rear attachment point, so I'll need to figure another way to anchor the deck to the chassis. Who wants to bet there's a magnet involved?

That's all for now. I hope this solution works, but if it doesn't, there may be another. Don
No comments:
Post a Comment