The first thing I did was add a foundation under it. I used four-course strips cut from a piece of Pikestuff Concrete Block Walls. Let me take a moment to say something nice about Pikestuff. If you model or scratchbuild in styrene, and have not used any products by Pikestuff (or Rix), you owe it to yourself to check them out. With crisp castings and fine detail, no warping, and almost no flash, it's a joy to use. Now, back to our program. I just used the base portion of the crusher to determine the dimensions of the foundation. The crusher has a roll-up garage door, which now would need a ramp to access, so I included two retaining walls to contain the ramp.

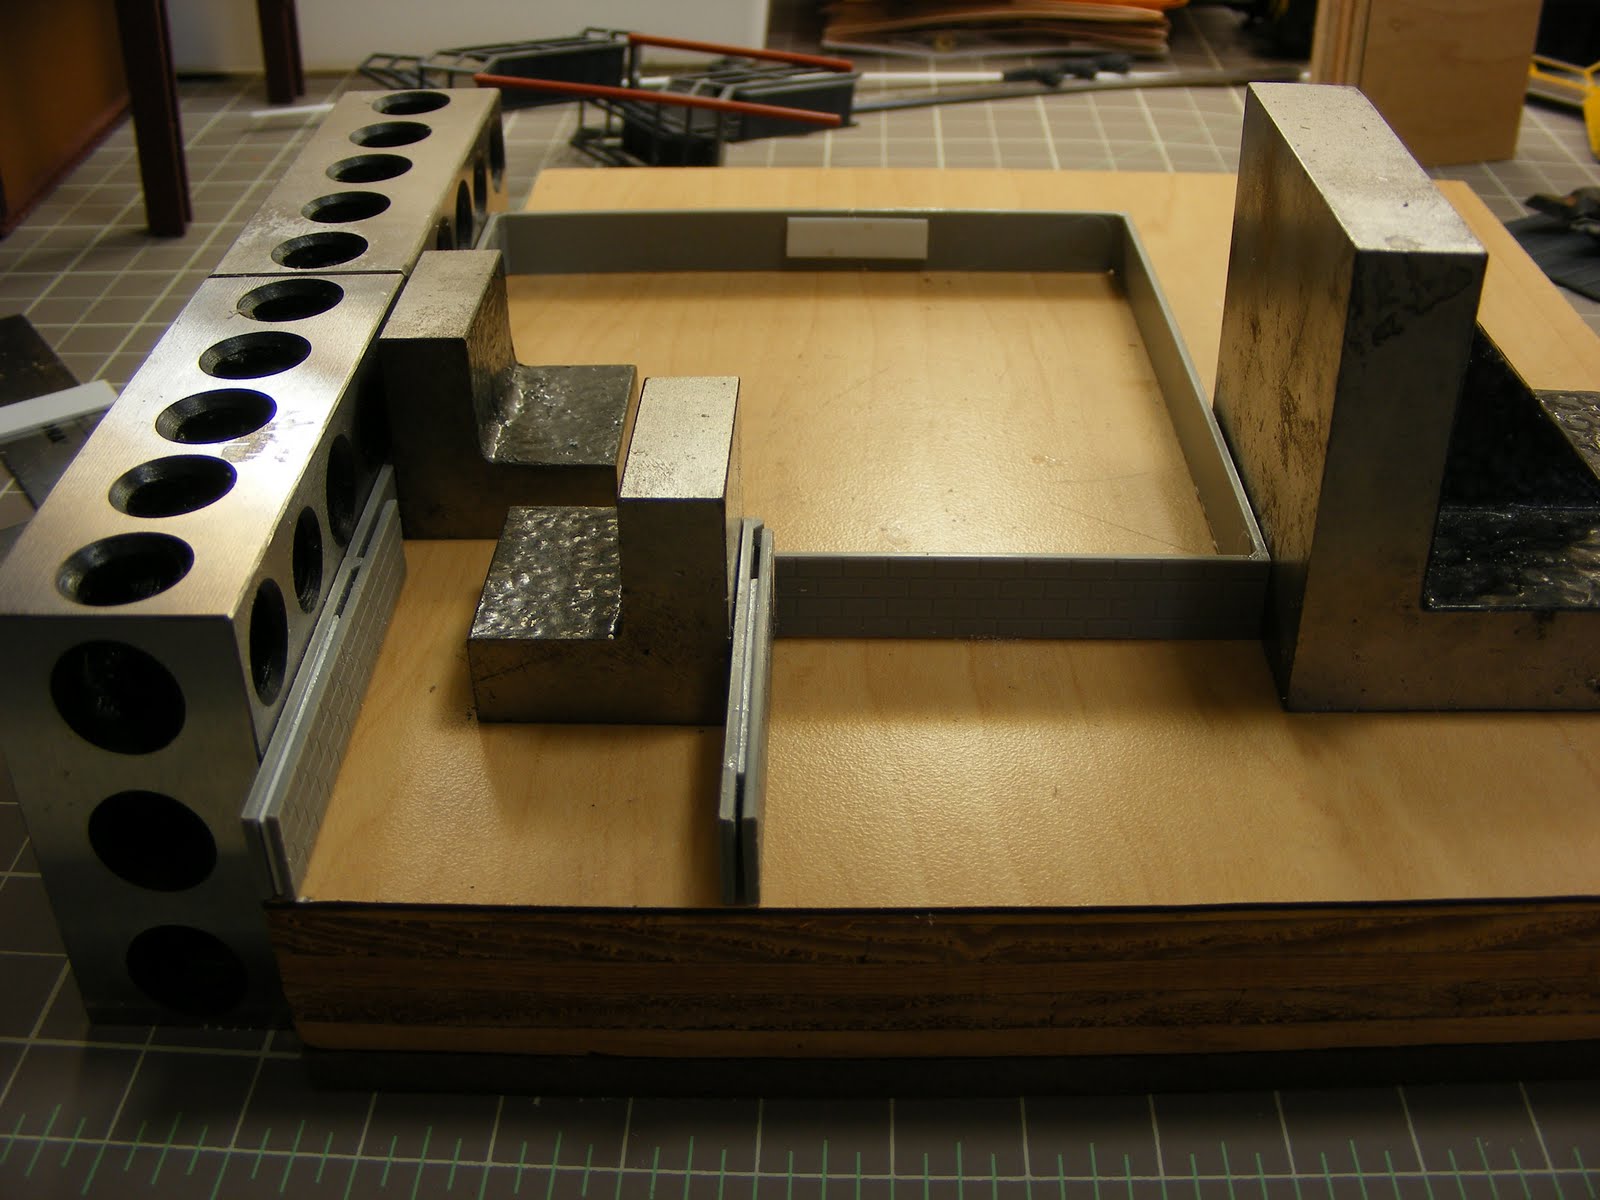
The glue-up of the foundation. Who'd a thought something as simple as metal blocks would be so useful, but I wonder how I lived all these years without them. The 'L' shaped ones are Machinist's Bocks. All surfaces are at 90° to each adjoining face, and all are dead-flat. The ones with the holes are 1-2-3 Blocks, so called because they are 1" x 2" x 3." All of their surfaces are also 90° to each other, allowing you to square-up your project, while the weight of them holds the parts together while glueing. Here, the small block is holding the center retaining wall hard against the front wall, which is anchored by the large block. Notice the shim between the two pieces that make up each retaining wall, to beef them up.
I thought the crusher needed more than the roll-up door to gain entry, so I cut out a section of wall and added this door.

When I measured the foundation strips, I left the right side long enough to include a concrete walkway under the door, which I made from .030 stock. Square stock at the ends of the retaining walls represent concrete pillars. The two triangular pieces are there to support the sides of the ramp.

The ramp is in, as well as .030 x .125 strip to cap the tops of the retaining walls. A little Squadron green putty fills the joint between the walkway and the ramp nicely. Steps made from Central Valley stairs complete the scene...... for now.

Walthers' kits have a good fit overall, but even when assembled properly, the roof-lines have an unsightly gap. I covered it here with a ridge cap made frome some thin .010 x .125 styrene. From now on, all roof-lines will meet with mitered edges or have ridge caps.

The crusher re-assembled. I added an exhaust fan to the side (And tell me why you think it needs to be relocated.). I think the building still needs some things, notably stairways, but those will have to wait until I determine the conveyor layout.

That's all for now. I hope you enjoyed it, and I welcome any comments. Don
Wholly Cr#p Don!!!!
ReplyDeleteI really can't get over you modeling skills. Not to sound like a kiss-up, but you really do inspire me. I'm in the process of building a Logistics warehouse for my layout (read: collecting parts). The buildings are going to be ground level, so the truck loading docks are below grade, and now I have an idea on how to build my ramp. Thanks!
Keep up the amazing work,
Jeff