Saturday, December 10, 2011

Inspiration from an Old Friend, Pt.10

We're getting close to the conclusion. I've been wrapped up in little details this last week, so yesterday  I did a dry assembly to see where I stood.  Here are the results.

The back of the building. Mostly done, just need to install the view blocks, and maybe place some crates or pallets in the loading dock. I will install a spur up to the dock when I do the groundwork around the building. Also a final black-wash over the back after complete assembly.


I think there is enough 'rust' on the vents and the AC unit, as well as the water marks. The skylights are not nearly so white in person, but they could use a little more grubbiness. Need to touch-up the wall cap, it's just primered as of now. When the two roof sections are joined, I'll either gravel it or tar the joint.


These two sides need major weathering with washes. Sure is a lot of blank, blue wall here. What can give it more interest? Vines, maybe?


Yep, more weathering. Also need to install a view block on this side , too.


I have to say, I like the vines.


The stairway is nearly complete, just sanding and painting left to do. This end is still pretty blaah looking. Maybe some awnings over the windows and doors are in order.


Well, the end is in sight. One or two more installments, and we can call it finished. I'm kind of excited. Don

Tuesday, December 6, 2011

Inspiration from an Old Friend, Pt.9

Well, I tried a few things to salvage the roof from Pt.8, but I just seemed to make things worse. I had already put gravel down on the small roof over the blue corrugated side, so I went ahead and put gravel down everywhere. You can still faintly see the tar lines under the gravel. I think it looks OK.


This is after two black washes to weather and age the roof details. I'm sure a few more will be in order when all the building's components are finally assembled.


Now let's move to the back wall, and confront my biggest nemesis..........glazing. Traditionally, I do not put 'glass' in my projects. I refer to myself as the Paneless Modeller. Not sure why, probably because I make a mess of it. However, I felt this project deserved  the whole shootin' match. So I thought I'd try this new adhesive I got a while back. I'd like to say it is two-sided tape, but there's no tape here, only the adhesive. It was a little tricky to apply, but once I had a system figured out, it went pretty quickly. I took my clear plastic and drew two lines, the distance between them the same as the internal width of the window. I rolled the adhesive on to the outside of those lines, as you can see in the picture. Then I firmly pressed the windows down on the adhesive. (The really nice thing about this product is there is almost no thickness to it.)  Once I was sure they were stuck, I sliced them all apart with my X-acto.


After that, they glued in nicely.


This is a smal flue pipe that comes through the upper left window. The bracket I made out of flat brass wire.


The small roof got gravel, too.


Here's an 'Oh, By the Way.'  I imagine you have figured out by now that I like using plastic. The problem was, as my stock collection grew, I spent as much time looking for the needed piece as I did on the rest of the project. I ended up buying accordian file folders for all my dimensional stock 15" or less. All of the sheet goods under 12" are separated in the dividers. They take up one whole drawer in my legal-size file cabinet.


I wanted to put some kind of interior or view-block, so I made some simple styrene boxes to fit on the inside of the back wall. I'll see if I can find any photos I  can place inside them.


This is the back wall after the first black wash. It'll take a few more. I did paint the inside of the upper left windows 'Antique White.' The view-blocks were being primed when I took this photo.


It's really coming together now. I guess the next thing I have to tackle is the stairway on the corrugated front.  If you haave any questions or comments, please don't hesitate. Don


Friday, December 2, 2011

Inspiration from an Old Friend, Pt.8

Now we're back to the roof over the middle section. I wanted this one to represent a tarred roof to contrast to the gravel roof (which technically is a tarred roof as well). I wanted it to be a tired-looking, faded tar over tarpaper surface with darker, newly applied tar lines over the joints.


Here it is primed and painted with a Tamiya Panzer Grey rattle-can. All of the roof fixtures have been painted, and some weathered.


This is the tool I made to cut wide lines in masking tape to represent the tar lines. Made out of scrap styrene that was on the Workbench, it holds two X-acto blades securely in alignment. A .010 styrene shim between separates them the proper distance.


I discovered if you took a bottle of Tamiya's Dark Grey, and didn't shake it well enough, it gave a blotchy, faded look. Perfect. I slathered it on with a large brush, not worrying about brush strokes. (If you've seen real roofers appling the hot tar with large mops, you'll understand why.)


I then covered the roof with masking tape, then marked lines a scale 36" all the way across.


I used the double-bladed knife to cut out the lines freehand.


This is a liquid substance to represent lead with faux stained glass. It would dry proud of the roof surface, looking just like tar. The piece of plastic is the screed to force the lead into the gaps between the tape.


The lead applied easily, with good coverage. I let it set til dry, then removed the tape.  OH NO! DISASTER! About half of the lead pulled off with the tape. I didn't have that problem when I did a few test runs.  However, in those tests I used individual pieces of tape laid side by side, and they were well-burnished to the surface. After cutting the grooves with the double knife, I didn't burnish the newly-cut sides back down. Live and learn.


Anyway, I removed the remainder of the lead, then used a Sharpie to color in the lines. Not really happy with the results, and will have to consider solutions.


Let me know what you think. Thanks for lookin in. Don

Sunday, November 27, 2011

Inspiration from an Old Friend, Pt.7

Back at the vines. I needed to anchor them to the wall in various places. I started by drilling small holes in the in the wall. Then I took loops of the 32 ga. wire, placed over the vine, then pushed both ends through the hole.


I left some slack in the vines so they could stand away from the wall. I pulled the loop taut.........


..........then fixed them in place from behind with a drop of CA.


Here are the four vines attached to the building. I left the top couple of inches free on the two left vines. (Did anyone notice I painted the cap tiles?)


I glued the smokestack to the small roof, drilled two holes on opposite sides, made two 'eyes' out of .015 brass wire and glued them in the holes. I made the guy wires out of the same brass wire, and anchored them to four holes drilled in the corners of the roof.


I painted the guy wires black, then twisted the two left vines around them. Time to add the foliage.


Three items needed to leaf out the vines: a cap full of full-strength Elmer's glue, a microbrush, and some fine, green ground foam.


Apply the glue liberally to the wires, trying to keep it off the walls. Sprinkle the ground foam on the glue.


I'm working up the wire. Where the vine is anchored to the wall by the loops, I applied the glue out onto the block. Sprinkle, let set a minute, then gently tap the excess foam off. There were some spots the foam didn't stick to, so keep applying the glue and sprinkling the foam.


Here are a few shots showing the vines after about five touch-up steps. I think they look pretty good. I also added the vent to the upper roof. I painted the inside of the smokestack 'oily black' and dry brushed the outside with the same. A few drops of black in a cap full of water gave me a 'wash' to stain the wall below the window. I also used it to weather the bottom of the corrugations on the awning, and dry brushed 'rust' on the tops of the corrugations


Still a few details to attend to, but I'd say this part of the project is 90% done. Now back to the center portion of the building.  Thanks for looking. Don

Friday, November 25, 2011

Inspiration from an Old Friend, Pt.6

Wow, it's been almost three months since my last entry. I didn't mean to be away this long, but pursuing other interests, a month-long illness, and a major case of  Don't Give a Damn took its toll. But I'm feeling better, and hope to be at the Workbench every day. I've been working on the kitbash the last couple of days, and hope to finish it up in the next week.

I moved from the main, middle roof to the two small roofs over the cement block addition. I wanted both of these to be tar and gravel covered.


In the past I would use 80 or 100 grit sandpaper to represent gravel roofs. The problem with sandpaper is it tends to curl up at the edges. This time I'd try gray N-scale ballast for the gravel, mixed with a little coal for contrast. I would use matt medium to fix it in place.


I tried several methods of applying the gravel, and found pinching it between my thumb and index finger gave the most even coverage. Then I saturated it with a pipette of the matt medium. After it had mostly dried, I applied more gravel in the thin spots, and set it with more medium.


This is what it looks like when dry. You can see there are still a few thinly covered spots. It took three applications to get it right.


Here you can see that I did the lower roof, plus had a big oops with the matt medium. I think some leafy vines should cover it nicely. I've made climbing vines before by simply gluing ground foam directly to the walls. Here I wanted to experiment by showing the vine itself in places, as well having it away from the wall in others. I need a wire armature.


I unspooled a few feet of  32 ga. wire, and looped it back and forth every six inches til I had 8-9 strands.


At one end, I twisted the bundle leaving some loops. These would represent the root ball. At the other end, I cut the wires flush.


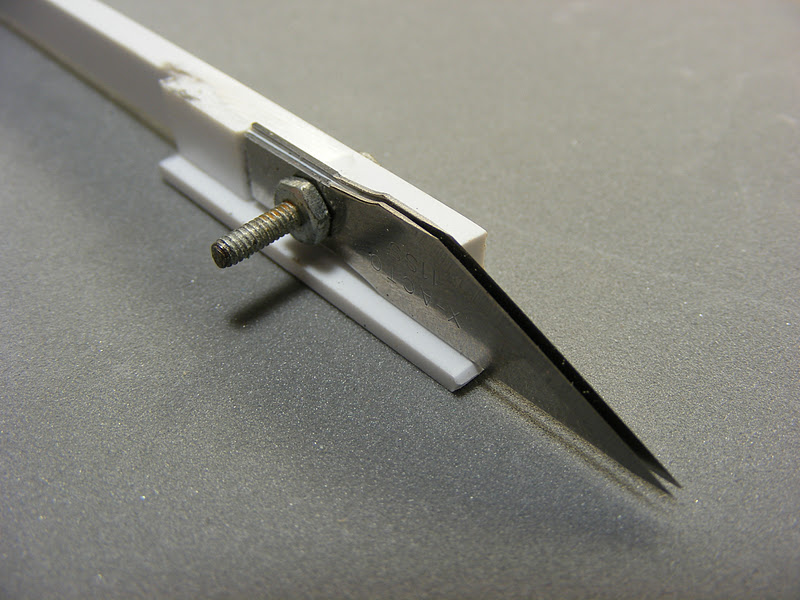
I snipped the loops at their  bottoms, then twisted them into four 'roots.' CA drizzled on locks the wires together. I then carved the end of a .250" x .125" styrene strip to the shape shown.


I drilled a small hole and inserted the shortest bundle in it. The remaining three were draped over the end, with more CA applied.


I cut the 'root ball' off, then trimmed it some more to fit this corner.


I took two or three wires at a time, chucked them in my hand drill, then twisted them into four vines. Then off  to coat them in red primer.


While the primer dried, I added the mortar with a product called Robert's Mortar. Not sure I've gotten the hang of it yet, but after weathering it should look OK. Finally the wires were CA'ed to the wall.


That's it for now. Next time, I'll anchor the vines to the wall and add foliage. Til then.  Don